Back
Tuxgraphics ethernet host watchdog, version 4.x
The
software of routers and server does unfortunately occasionally
fail. In many cases a reboot can remedy the problem for a
while.
This host watchdog can improve the availability of your network or services
significantly and fix the problem automatically before anybody
starts to complain.
The this watchdog using "ping" (ICMP echo request) and a convenient web based
user interface. It integrates as well seamless into environemts which use
SNMP for network managemnt. The watchdog supports SNMP v1.
How it works
The host watchdog
- sends in intervals ping (ICMP echo request) to a host and waits
for the reply
or
- expects to receive pings (ICMP echo request) from the monitored host.
By sending the pings from the monitored host to the watchdog
you have the possibility add some application level checks at the host
using scripts. Application level checks are more complex checks that go beyond pure
IP level availability. Application level checks are optional. The simplest configuration
is to ping from the watchdog to a host.
The watchdog resets the host after 6 consecutive intervals of no
received ping or no ping reply. The watchdog goes then into a
"passive" state to avoid rebooting during startup of the host
(e.g interrupting a file system check). In this passive state it
will not issue a second reset even if the monitored host
appears to be not responding to ping or not sending ping. Once
the host answers, the watchdog goes back to the active state. In this
active state it would reset the host if it suddenly fails again to
respond.
The main page of the watchdog

The status line:
Status: OK or amount of missing pings [reset cnt: How
often a reset was initiated. This value goes back to zero on
power down of the the watchdog, state:
stopped|active|passive ]
The state stopped is shown if the watchdog is stopped via the
"actions" menu. Active means the watchdog is ready to reset the
host if needed. Passive means the host has not been reachable
yet since last reset (or after power down of the watchdog). The information
seen in the status line is as well available via SNMP (see further down).
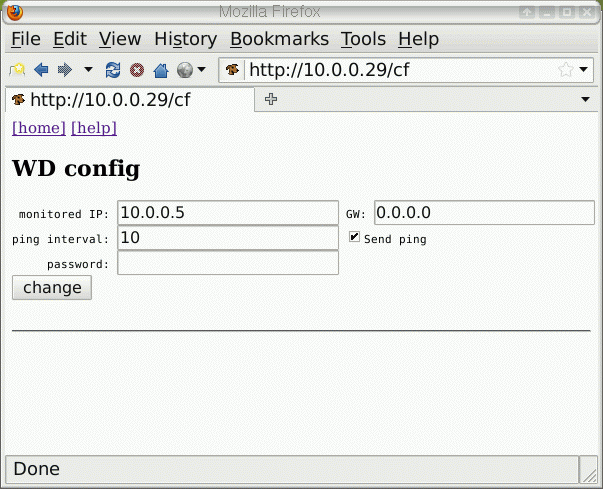
Monitored IP is the ip-address of the host to watch. Pings from
this host are counted as "host alive" and if the "send
ping" says "yes" then pings are also send to this IP address.
The ping interval is the time between pings sent out or
the time until a ping must be received. If you ping the watchdog
externally then the sending time should be less than the ping interval
configured at the watchdog. The value range for the ping interval
is 2 to 250 sec.
Configuring the watchdog
Here are all the parameters you can configure on this watchdog.
The values entered here correspond to what you will see afterwards
on the main page (see above).

Choosing a GW IP
The gateway IP should be set to 0.0.0.0 if the monitored host is
on the same LAN as the watchdog (0.0.0.0 means don't use the GW). In this case the pings will be
sent directly from the watchdog to the monitored host.
If you want to ping a host that is behind a gateway router (e.g a host
in the internet) then you should use the gateway IP address of your
router as GW IP.
Actions page
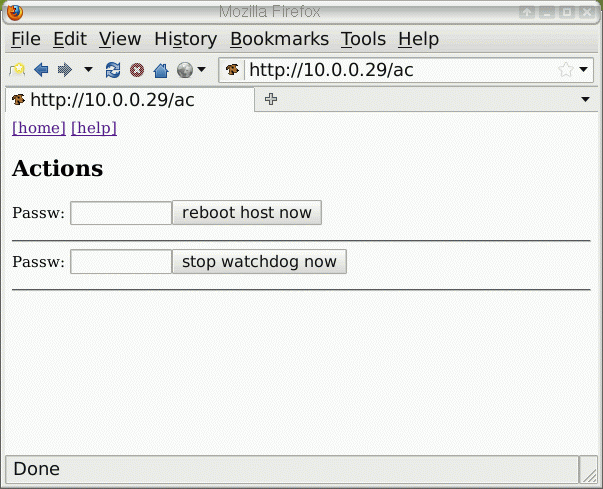
On the actions page you can trigger an immediate reset of the system
with the "reboot host now" button or stop the watchdog with the
"stop watchdog now" button. It is recommended to stop the watchdog
when performing maintenance on the monitored system. In the
stopped state the watchdog will not reboot the monitored host.
To start the watchdog again, after it was stopped, just go back
to the "actions page" and it will say "start watchdog now".

The actions page allows you to perform immediate manual actions.
Read Voltages
To help analyzing the health of a remote system
you can now read two voltages in the range from 0-30V DC.
This way you can e.g remotely check the power supply of the equipment or
the state of a battery.

The resultion of the analog to digital converter used is 12bit.
The voltage range is 0V-30V and it requires some additional resistors
which can easily be added on the dot-matrix field of the tuxgraphics
ethernet board:

Click on the image for pdf version of the diagram.
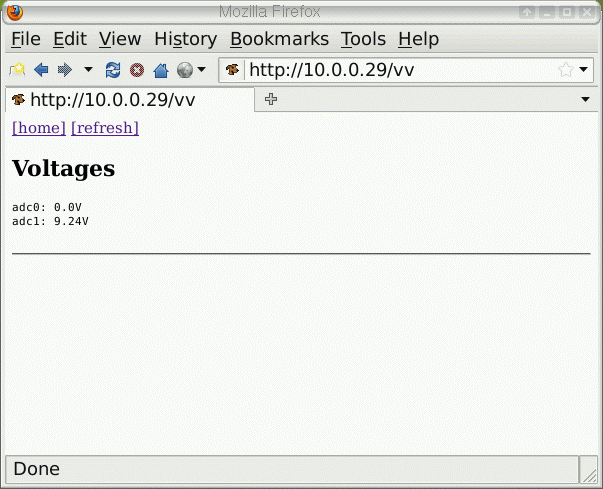
The voltages may individually be read via a command line
web browser like w3m or via snmp:
snmpget  -c public -v 1 10.0.0.29 1.3.6.1.4.1.42.4
 TUXGRAPHICS-HWD-MIB::voltage0 = STRING: 0.0V
snmpget  -c public -v 1 10.0.0.29 1.3.6.1.4.1.42.5
 TUXGRAPHICS-HWD-MIB::voltage1 = STRING: 9.22V

w3m -dump http://10.0.0.29:80/vv | grep adc0:
 adc0: 0.0V
w3m -dump http://10.0.0.29:80/vv | grep adc1:
 adc1: 9.23V
Configuring the watchdog's own IP address
Version 2.X allowed to change the devices IP address remotely over
the internet. This feature is removed in version 3.X and 4.X for security
reasons. You must now have physical access to the watch dog
to be able to change the IP.
If you bought the board with pre-loaded software then you can
change the IP by setting a jumper on the board.
If you compiled and loaded
the software yourself then you can change the IP device's own IP
in the source code and re-program the board.
Integration into an existing SNMP network management system
The host watchdog supports SNMP (Simple Network Managment Protocol) and integrates therefore seamless into
existing SNMP based network management systems.
All elements are read-only. The "10.0.0.29" is the IP address of
the watchdog in the below example. Replace it with the IP address or the hostname you
gave to your watchdog. The SNMP agent on the watchdoc board listens to port 161 and supports SNMP version 1.
The watchdog supports the following information elements in software version 4.0:
snmpwalk  -c public -v 1 10.0.0.29 1.3.6.1.4.1.42.0
 TUXGRAPHICS-HWD-MIB::name = STRING: host watchdog
 TUXGRAPHICS-HWD-MIB::resetCnt = INTEGER: 0
 TUXGRAPHICS-HWD-MIB::status = INTEGER: 0
 TUXGRAPHICS-HWD-MIB::state = STRING: active
 TUXGRAPHICS-HWD-MIB::voltage0 = STRING:  1.0V
 TUXGRAPHICS-HWD-MIB::voltage1 = STRING:  1.3V
 End of MIB
Download the MIB for software version 4.0: TUXGRAPHICS-HWD-MIB.txt
In software version 4.1 two new OIDs were intoduced to make
it possible to read voltages not only as display strings but
as well as integer values (unit=voltage times 100). A lot of
SNMP management software can process integer values better (e.g
graph them or alarm on thershold values):
snmpwalk  -c public -v 1  10.0.0.29 1.3.6.1.4.1.42
TUXGRAPHICS-HWD-MIB::name = STRING: host watchdog
TUXGRAPHICS-HWD-MIB::resetCnt = INTEGER: 0
TUXGRAPHICS-HWD-MIB::status = INTEGER: 0
TUXGRAPHICS-HWD-MIB::state = STRING: active
TUXGRAPHICS-HWD-MIB::voltage0 = STRING: 20.87V
TUXGRAPHICS-HWD-MIB::intvoltage0 = INTEGER: 2087
TUXGRAPHICS-HWD-MIB::voltage1 = STRING: 20.54V
TUXGRAPHICS-HWD-MIB::intvoltage1 = INTEGER: 2054
End of MIB
Download the MIB for software version 4.1: TUXGRAPHICS-HWD-MIB-4.1.txt
Adding application level checks (checking if the host really works)
You can add some more
sophisticated checks by only pinging the watchdog from the host
(the "send ping" box not checked). This way you can write a
script which does some additional checks on the host and make
sure that the application layer (e.g web-server) is really up and working:
#!/bin/sh
while true; do

# put your additional checks here (example check webserver is responding):
if w3m -dump_head http://localhost | grep Content-Type > /dev/null; then
    ping -c 1 -q -w 2 10.0.0.27
    # 10.0.0.27 would be the IP of the watchdog, adapt this as needed.
fi
# end of additional checks

sleep 8
done
Thoughts on reliability and DOS attacks
A problem for servers on the internet are DOS attacks where
usually virus infected windows PCs are used to attack a server
by overloading it with requests. In such a case the host might not
be responsive to the watchdog. The chances for this to
happen are a bit reduced because the watchdog will only hit
after 6 response failures in a row. If you have a host that
might get temporarily overloaded then consider to use longer ping intervals
(e.g 60sec). You can also enforce at the router facing the
internet a bandwidth limit to make sure that your hosts
do not totally lock-up when they are attacked. A second target
could be the watchdog itself. The best protection is to not
allow any external traffic towards the watchdog. This can e.g
be done by only using private IP addresses between host and
watchdog or by using a firewall.
External connections
A relay to control the reset button of the monitored host or
to interrupt the power supply of the monitored host can be connected
to pin PD7. The tuxgraphics ethernet board has already a transistor
and fly-back diode on board to support a relay. All you need is an external 6V relay.
A LED can be connected on pin PB1. It will turn on as soon as
the first missed ping is detected and it goes off when pings resume.
This LED is optional.
Pairs of 10K and 270K resistors set up as voltage dividers can be connected to pins ADC0 and ADC1
to use the watchdog to measure voltages in the range between 0V and 30V DC.
Monitoring a network link
The host watchdog is designed to monitor an IP host (server) but
you can also use it supervise transport equipment. WIFI routers
are often used to provided a wireless network link to a remote
site or to provided local IP network coverage. Due to firmware
quality problems those routers may stop working. Rebooting the
router will remedy the problem. To monitor the WIFI network
you can use two watchdogs and a WIFI bridge. The watchdogs are configured
to ping each other across the WIFI connection.
     WIFI-Router  . . . . . . . . .  WIFI-Bridge
         |                               |
         |                               |
      watchdog-1                     watchdog-2
      plugged in at                  Will reset bridge
      the router.
      Will reset router.
After a failure of the WIFI network both watchdogs will trigger.
It might unnecessarily reset the WIFI-Bridge but this setup will
ensure that we recover also from a WIFI-Bridge failure.
Back© tuxgraphics


